
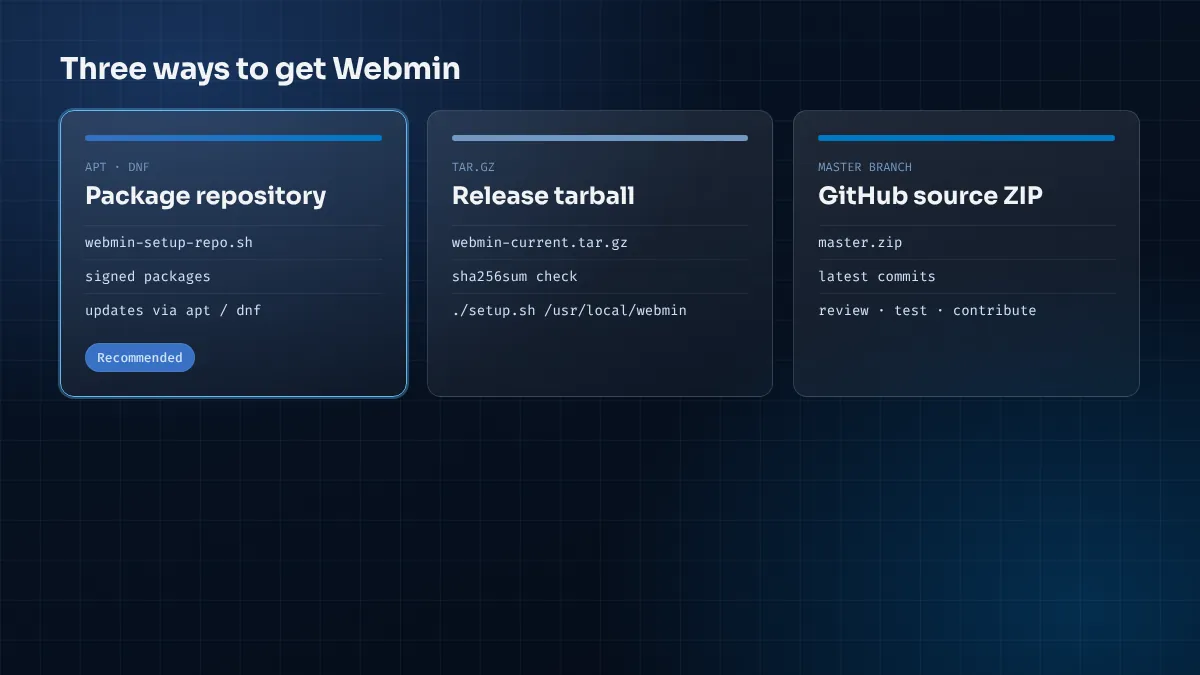
Key takeaways
- The package repository is the recommended route for production servers.
- The release tarball suits systems without DEB or RPM support, such as FreeBSD.
- The GitHub master ZIP is live development code for review and testing.
- Always verify archives and keep a record of which method each server used.
Searching for a Webmin download turns up three different things: a repository setup script, a versioned tarball and a ZIP of the GitHub source. All three come from the same project, and all three end with Webmin answering on port 10000, but they behave very differently once the server is in service. The choice decides how updates arrive, where files live and how easy the server is to hand over to a colleague. This guide compares the routes, shows how to verify what you downloaded and gives a clear recommendation for each kind of machine.
The three download routes
| Package repository | Release tarball | GitHub source ZIP | |
|---|---|---|---|
| What you fetch | webmin-setup-repo.sh | webmin-current.tar.gz | master.zip |
| Contents | Signed DEB or RPM packages | A tested release | Latest commits on master |
| Installer | apt or dnf | ./setup.sh | ./setup.sh |
| Updates | With system upgrades | From the Webmin UI | Manual |
| Best for | Production Linux servers | BSD, macOS, other Unix | Review, testing, contributing |
Route 1: the official package repository
This is the method the Webmin project recommends for Linux. A small shell script adds the project's signing key and package source to your system, after which Webmin is just another package. The same script covers Debian, Ubuntu and Kali on the DEB side, and RHEL, Rocky Linux, AlmaLinux, Oracle Linux, CentOS Stream and Fedora on the RPM side.
curl -o webmin-setup-repo.sh https://raw.githubusercontent.com/webmin/webmin/master/webmin-setup-repo.sh
less webmin-setup-repo.sh        # read it before running it
sudo sh webmin-setup-repo.sh
Then install with your package manager:
# Debian, Ubuntu and derivatives
sudo apt-get install webmin --install-recommends

# RHEL and derivatives
sudo dnf install webmin
Why this route wins for production:
- Security fixes arrive automatically with
apt upgradeordnf upgrade, and unattended upgrade tools pick them up too. - Dependencies are resolved for you, including the Perl modules needed for HTTPS and PAM logins.
- Files land in standard places: programs in
/usr/share/webminon Debian or/usr/libexec/webminon RHEL, configuration in/etc/webmin, logs in/var/webmin. - Removal is clean with
apt remove webminordnf remove webmin.
Our Webmin on Ubuntu guide walks through this route in full on 24.04 and 22.04.
Route 2: the release tarball
The tarball is a complete, versioned release packed as .tar.gz. It is the route for systems that have no DEB or RPM support, such as FreeBSD, macOS, AIX or a niche Linux distribution. The project also offers a minimal tarball that contains only the core modules.
cd /tmp
gunzip webmin-current.tar.gz
tar xf webmin-current.tar.gz
cd webmin-current
sudo ./setup.sh /usr/local/webmin
setup.sh asks a series of questions: where to keep configuration and log files, the full path to Perl, the web server port, an administrator login and password, whether to use SSL, and whether to start Webmin at boot. The defaults are sensible for most systems. Write your answers down; you will need them when you hand the server over.
Tarball installs can be upgraded later from Webmin Configuration → Upgrade Webmin, which downloads and applies a newer release in place.
Route 3: the GitHub source ZIP
The Webmin source is developed in the open on GitHub. GitHub offers a ZIP of any branch, and the link most people share points to the master branch:
curl -L -o webmin-master.zip https://github.com/webmin/webmin/archive/refs/heads/master.zip
unzip webmin-master.zip
cd webmin-master
Inside you will find a folder for every module, such as useradmin, apache, bind8, cron and firewall, alongside the core files miniserv.pl and web-lib-funcs.pl, the setup.sh installer, the README and the BSD licence.
The important thing to understand is what master means. It is the current development line, so it contains fixes and features that have not yet been bundled into a numbered release, and occasionally a change that is still being tested. That makes the ZIP ideal for:
- checking whether a bug you hit is already fixed upstream;
- reviewing code before a security assessment;
- building a test server for a module you are writing;
- preparing a pull request.
It is not the best choice for a server your business depends on, because there is no version number to track and no package manager to deliver fixes. If you do install from it, run ./setup.sh /usr/local/webmin exactly as with the tarball and keep notes of the commit date you used.
Verifying what you downloaded
Webmin runs with root privileges, so make sure the bits you install are the bits the project published.
- Repository packages are signed. apt and dnf check the signature automatically against the key the setup script installed, and refuse unsigned or altered packages.
- Tarballs have SHA-256 checksums listed on the official download page. Compare them with
sha256sum webmin-*.tar.gz. - GitHub ZIPs come straight from GitHub over HTTPS. Test the archive with
unzip -t, and if you need a fixed reference, download a specific tag or commit rather than the moving master branch.
Only download from the official Webmin site or the webmin/webmin GitHub repository. Mirrors and "pre-configured" bundles on file-sharing sites are an easy way to install someone else's backdoor.
Which route should you choose?
- Production Ubuntu, Debian, Rocky, AlmaLinux or RHEL server: the package repository, without exception.
- FreeBSD, macOS or another Unix: the release tarball.
- Test lab, code review or development: the GitHub ZIP, ideally on a disposable virtual machine like the one in our Webmin demo lab guide.
- Containers: build an image from the repository packages; see the Webmin Docker guide for the trade-offs.
Related downloads: Usermin and Virtualmin
Two sister projects often appear next to Webmin. Usermin gives ordinary users a web interface for webmail, password changes and their own files, and listens on port 20000 by default. Virtualmin is a hosting control panel built on top of Webmin for managing many domains, websites and mailboxes. Neither is needed to use Webmin, and both have their own installers. Add them only when you have a clear use for them; every extra service is something else to patch.
Full or minimal package?
Alongside the standard package and tarball, the project offers a minimal edition containing only the core modules. It suits appliances, small containers and servers where you want the panel to show as little as possible. The trade-off is that adding a module later means installing it separately. On a general-purpose server the full package is simpler, and you can still hide modules you do not use from Webmin Configuration → Reassign Modules or by not granting them to any Webmin user.
Installing on a server without internet access
Some servers sit on isolated networks. In that case download the DEB or RPM file, or the tarball, on a connected machine, verify its checksum, copy it across, and install locally with sudo apt install ./webmin_*.deb or sudo dnf install ./webmin-*.rpm. The package manager will still need the Perl dependencies, so mirror those as well or point the server at an internal repository. Make a note to repeat the process for every security release, because an offline server will not pick up updates on its own.
Keep a record of how each server was installed
Mixed methods across a fleet cause surprises. A tarball server keeps programs in /usr/local/webmin, a Debian package uses /usr/share/webmin, and an RPM uses /usr/libexec/webmin. Helper paths such as changepass.pl differ accordingly, and so does the update mechanism. A one-line note per server in your inventory, recording the method and date, saves time during an incident. If you want to consolidate, removing a tarball install and reinstalling from the repository keeps the configuration in /etc/webmin, but back that directory up first.
Whichever route you pick, write down the version you installed and the date, and subscribe to the project's release announcements so you know when a security update is due.
Removing a tarball or ZIP install
Tarball and source installs do not register with the package manager, so apt and dnf cannot remove them. The installer places an uninstall script in the configuration directory instead. Run sudo /etc/webmin/uninstall.sh, confirm the prompt, and the program files and configuration are removed. Close port 10000 in the firewall afterwards. If you are switching to the repository version, back up /etc/webmin first so you can copy across custom settings such as Webmin users and access rules.
Frequently asked questions
Where is the official Webmin download?
From the project website and the webmin/webmin repository on GitHub. Avoid third-party mirrors and repackaged bundles.
Is the GitHub master ZIP the same as the latest release?
No. It contains the newest development commits, which may include changes not yet in a numbered release.
How large is the Webmin download?
The package is a few tens of megabytes; installed size with all modules is a few hundred megabytes at most.
Does downloading Webmin cost anything?
No. Webmin is free and open source under the BSD 3-Clause licence.
After the download
Whichever route you chose, the next steps are the same:
- Allow TCP 10000 in the firewall, limited to trusted addresses.
- Open
https://server-ip:10000and sign in. - Replace the self-signed certificate and turn on two-factor authentication.
- Remove or hide modules for software you do not run.
The login guide covers step two in detail, including the Ubuntu root-password trap that catches most first-time users.