
Key takeaways
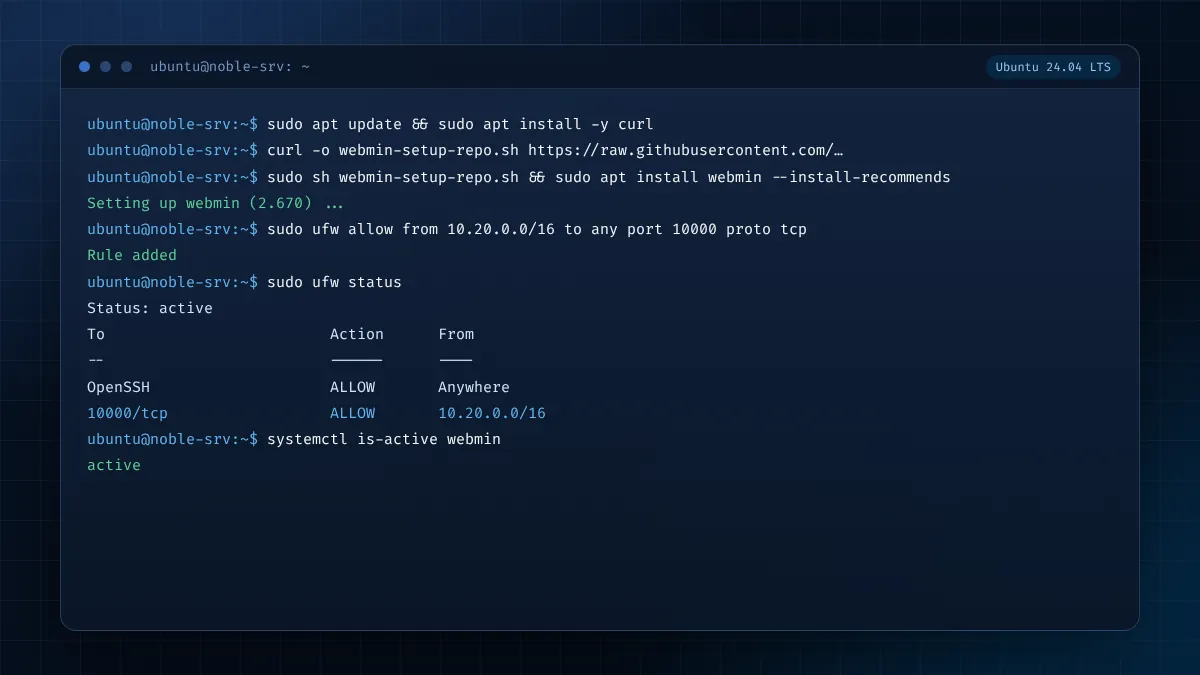
- Use the official repository script, then apt-get install webmin --install-recommends.
- Allow port 10000 in ufw, scoped to your own network where possible.
- Sign in with your sudo user; Ubuntu leaves root without a password.
- Webmin updates arrive with apt upgrade and unattended-upgrades.
Ubuntu LTS is the most common home for Webmin, and the pairing works well: Ubuntu provides a stable base with five years of standard security updates, and Webmin puts users, packages, services, firewall rules and disks into a browser. This guide installs Webmin on Ubuntu 24.04 "Noble Numbat" and 22.04 "Jammy Jellyfish" using the official repository, then covers the firewall, the first login and the Ubuntu-specific settings that save time later. The same steps apply to Ubuntu Server on bare metal, a cloud VPS or a virtual machine.
Before you start
- A server running Ubuntu 24.04 LTS or 22.04 LTS, with at least 512 MB of RAM; 1 GB or more is more comfortable once you add other services.
- SSH access as a user with sudo privileges.
- The server's IP address, and ideally a DNS name if you want a trusted certificate later.
- An idea of where you will connect from, so you can restrict access.
Update the system first so you are not installing on top of stale packages:
sudo apt update && sudo apt upgrade -y
sudo apt install -y curl
If the upgrade pulled in a new kernel, reboot before continuing.
Step 1: add the Webmin repository
The Webmin project maintains a setup script that adds its signing key and APT source. Download it, glance through it, then run it:
curl -o webmin-setup-repo.sh https://raw.githubusercontent.com/webmin/webmin/master/webmin-setup-repo.sh
sudo sh webmin-setup-repo.sh
The script asks for confirmation, installs the key and writes the repository definition. It also refreshes the package lists, so Webmin is now visible to apt.
Step 2: install Webmin
sudo apt-get install webmin --install-recommends
The --install-recommends flag matters on Ubuntu. Some systems are configured not to install recommended packages, and Webmin relies on recommended Perl modules for HTTPS support and for PAM authentication. When the install finishes, apt prints the address to visit, along the lines of Webmin install complete. You can now login to https://your-host:10000/.
Confirm the service is running and listening:
systemctl status webmin --no-pager
sudo ss -tlnp | grep 10000
You should see active (running) and a miniserv.pl process on port 10000.
Step 3: allow Webmin through ufw
Ubuntu ships with ufw, the Uncomplicated Firewall. It may be inactive on a fresh install. If you enable it, allow SSH first so you do not cut off your own session:
sudo ufw allow OpenSSH
Then allow Webmin. The scoped version is strongly preferred:
# allow only your office or VPN network
sudo ufw allow from 10.20.0.0/16 to any port 10000 proto tcp

# or, if you must, allow from anywhere
sudo ufw allow 10000/tcp

sudo ufw enable
sudo ufw status
On a cloud VPS, add the same inbound rule to the provider's firewall or security group. Many "Webmin is not loading on Ubuntu" reports turn out to be a cloud firewall dropping traffic before it reaches the server.
Step 4: sign in with your sudo user
Open https://your-server-ip:10000 in a browser and accept the certificate warning for this first visit.
Now the Ubuntu-specific part: do not try to log in as root. Ubuntu locks the root password by default, so PAM will reject it every time. Use the account you created during installation, or your cloud image's default user, with that account's password. Webmin's package automatically accepts any user who can run all commands with sudo.
If your cloud user only has an SSH key and no password, set one:
sudo passwd ubuntu
For more on accounts, password resets and lockouts, see the Webmin login guide.
Step 5: first settings on Ubuntu
Get a trusted certificate
If the server has a DNS name pointing at it, go to Webmin → Webmin Configuration → SSL Encryption → Let's Encrypt, enter the hostname and request a certificate. Webmin needs to prove control of the name over HTTP, so port 80 must be reachable for the challenge, and a web server such as Apache must be serving the document root you select, or you can use the built-in option the form offers. Webmin renews the certificate on the schedule you choose.
Turn on two-factor authentication
Under Webmin Configuration → Two-Factor Authentication, choose the Google Authenticator provider. Webmin offers to install the required Authen::OATH Perl module. Then enrol each user from Webmin Users and scan the QR code with any TOTP app.
Restrict by IP
Under Webmin Configuration → IP Access Control, allow only the networks you trust. Combined with the scoped ufw rule, this keeps the login page invisible to the rest of the internet.
Let Webmin show package updates
The dashboard reports pending updates. The Software Package Updates module can install them on demand or on a schedule. If you already use Ubuntu's unattended-upgrades, leave security updates to it and use Webmin to review what is pending.
Useful modules on Ubuntu
| Task | Module | Notes |
|---|---|---|
| Accounts | Users and Groups | Add users to the sudo group here. |
| Firewall | Linux Firewall / FirewallD | ufw users may prefer to keep rules in ufw. |
| Services | Bootup and Shutdown | Start, stop and enable systemd units. |
| Web server | Apache Webserver | Appears once apache2 is installed. |
| Databases | MySQL / PostgreSQL | Manage users, databases and backups. |
| Disks | Partitions, LVM, RAID | Grow volumes and watch arrays. |
| Shell | Terminal | Full shell in the browser. |
Modules for software you have not installed appear under Un-used Modules. Install the package from the command line or the Software Packages module, then click Refresh Modules.
A note on ufw and the Webmin firewall module
Webmin's firewall modules edit iptables, nftables or firewalld rules directly. ufw also generates iptables rules from its own configuration. Mixing the two can produce confusing results, because a ufw reload may overwrite rules you added in Webmin. Pick one tool for firewall management on each server. On Ubuntu, many administrators keep ufw and simply use Webmin's Terminal module when they need to run ufw commands from the browser.
Upgrading Ubuntu with Webmin installed
Because Webmin came from a repository, it upgrades with the rest of the system. Before a release upgrade, such as 22.04 to 24.04, take a snapshot or backup, then run do-release-upgrade from SSH rather than from the browser terminal, since the web session may drop while services restart. After the upgrade, check that the Webmin repository entry is still enabled under /etc/apt/sources.list.d/ and run sudo apt update.
Removing Webmin cleanly
sudo apt remove webmin        # keep configuration
sudo apt purge webmin         # remove configuration as well
sudo ufw delete allow 10000/tcp
Your system settings, such as users, cron jobs and Apache sites, are untouched, because Webmin only ever edited the standard config files.
Ubuntu on cloud images, LXD and Multipass
Cloud and container images of Ubuntu are trimmed down compared with a full ISO install. Two differences matter for Webmin. First, the default user often has no password and logs in with an SSH key, so set one with sudo passwd before trying the web login. Second, some minimal images are configured not to install recommended packages, which is exactly why the --install-recommends flag belongs in the install command. If you are testing with Multipass, the VM gets an address on a private bridge that your desktop can reach, which makes it a quick way to try the steps in this guide.
Adding a web stack after Webmin
Many people install Webmin on Ubuntu as the first step towards hosting a site. A good order is to install Apache or Nginx, PHP and MariaDB from the command line or the Software Packages module, refresh modules, then configure each service in Webmin. Keep the Webmin port separate from the site: the site lives on 80 and 443, Webmin on its own restricted port. If you later need to host many sites with mail and DNS for each, that is the job Virtualmin was designed for.
If you manage several Ubuntu servers, repeat these steps on each one, then register them in Cluster → Webmin Servers Index on the server you use most often so routine changes can be pushed to all of them at once.
Frequently asked questions
Which Ubuntu versions does Webmin support?
Current LTS releases such as 24.04 and 22.04 are supported through the official repository, along with recent interim releases.
Why can't I log in as root on Ubuntu?
Ubuntu locks the root password. Sign in with your sudo user instead.
Does Webmin replace ufw on Ubuntu?
It can manage firewall rules, but mixing it with ufw causes confusion. Choose one tool per server.
How do I update Webmin on Ubuntu?
Run sudo apt update && sudo apt upgrade. Webmin updates with the rest of the system.
Ubuntu troubleshooting quick list
- Page will not load: check
systemctl status webmin, ufw and the cloud firewall. - Login rejected: use your sudo user, not root.
- HTTPS errors after install: reinstall with
--install-recommendsso the SSL Perl module is present. - Repository errors on apt update: re-run
webmin-setup-repo.shto refresh the key and source file.
With Webmin running on Ubuntu, you can manage the server from any browser. If you would like to rehearse the whole process first, build a throwaway VM following the demo lab guide.