
Key takeaways
- Open the new port in the firewall before you switch Webmin to it.
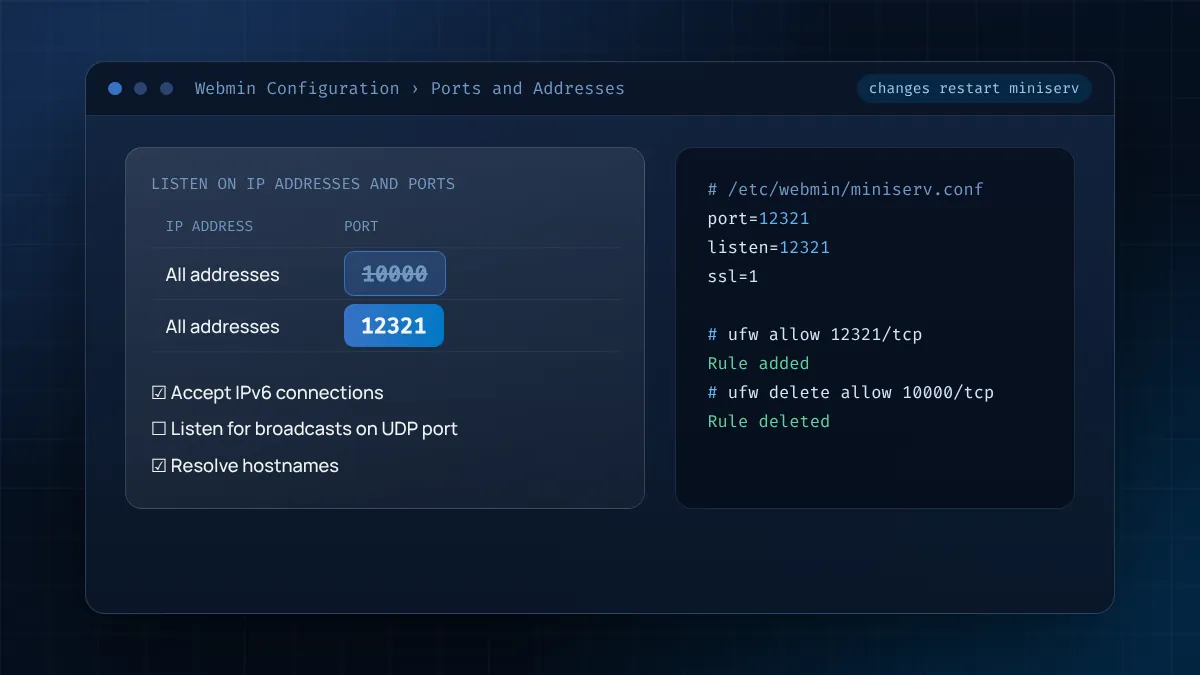
- Change the port in Ports and Addresses, or edit port= in miniserv.conf and restart.
- Cloud servers need the rule in the provider security group as well as on the host.
- Binding to a private or VPN address is stronger than any port number.
Webmin listens on a single TCP port for its HTTPS interface. Out of the box that is port 10000, but nothing forces you to keep it. Administrators change the Webmin port to dodge automated scans, to fit a corporate firewall policy, to free 10000 for another service, or to put Webmin behind a VPN interface. This guide covers how to change the port without losing access, how to open it in every firewall layer you are likely to meet, and how to restrict it so only trusted machines can connect.
If you only want to understand why 10000 is the default and what else listens nearby, read the companion Webmin default port explainer first.
Before you change anything
Changing the listening port is one of the few Webmin settings that can lock you out of the panel. Work from an open SSH session so you can roll back from the command line, and check three things:
- The new port is free. Run
sudo ss -tlnp | grep :12321, substituting your chosen number. No output means nothing is using it. - It is above 1024 and not reserved. High, unassigned ports avoid clashes with other software. Avoid well-known numbers like 8080 or 8443 that other tools may claim later.
- You know every firewall in the path. On a cloud server there are usually two: the host firewall and the provider's security group or network firewall.
Step 1: open the new port first
Add the new rule before you move Webmin. That way, if anything goes wrong, the old port still works and you can try again.
Ubuntu and Debian with ufw
sudo ufw allow 12321/tcp
sudo ufw status numbered
To allow only one network, which is the better choice, scope the rule:
sudo ufw allow from 10.20.0.0/16 to any port 12321 proto tcp
RHEL, Rocky Linux and AlmaLinux with firewalld
sudo firewall-cmd --permanent --add-port=12321/tcp
sudo firewall-cmd --reload
For a source-restricted rule, use a rich rule instead of opening the port to everyone:
sudo firewall-cmd --permanent --add-rich-rule='rule family="ipv4" source address="10.20.0.0/16" port port="12321" protocol="tcp" accept'
sudo firewall-cmd --reload
Cloud security groups
On AWS, Google Cloud, Azure, DigitalOcean, Hetzner and similar providers, add an inbound rule for the same TCP port in the instance's security group or cloud firewall. Restrict the source to your own IP or VPN range. A host rule alone is not enough if the provider drops the packet before it arrives.
Step 2: change the Webmin port
From the web interface
- Open Webmin → Webmin Configuration → Ports and Addresses.
- In the Listen on IP addresses and ports table, replace
10000with the new number. - Leave Accept IPv6 connections as it is unless you know you need to change it.
- Click Save. Webmin restarts its server and tries to redirect your browser to the new address.
If the redirect fails, type the new address yourself: https://server-ip:12321.
From the command line
The setting lives in /etc/webmin/miniserv.conf. Two lines matter:
port=12321
listen=12321
port is the TCP port the web interface uses. listen is the UDP port Webmin uses to answer broadcast discovery from other Webmin servers, which cluster features rely on. Keeping them identical is the common convention. Then restart:
sudo systemctl restart webmin
sudo ss -tlnp | grep miniserv
The second command should show miniserv.pl on the new port.
Step 3: close the old port
Once you have signed in on the new port, remove the rule for 10000 so the old opening does not linger:
sudo ufw delete allow 10000/tcp
# or
sudo firewall-cmd --permanent --remove-port=10000/tcp && sudo firewall-cmd --reload
Remember the cloud security group too. Leftover rules are one of the most common findings in server audits.
SELinux on the Red Hat family
With SELinux enforcing, a service can only bind to ports its policy allows. If Webmin refuses to start after a port change and journalctl -u webmin shows a permission error on bind, check the audit log:
sudo ausearch -m avc -ts recent
If the denial names the port, label it for web use with semanage, which comes from the policycoreutils-python-utils package:
sudo semanage port -a -t http_port_t -p tcp 12321
Never disable SELinux just to make a port change work. A single port label is a far smaller change.
Bind Webmin to one address
By default Webmin listens on all addresses. On a server with a public interface and a private one, you can tell it to listen only on the private side. In Ports and Addresses, change All addresses to a specific IP, for example the server's address on your WireGuard or OpenVPN network. In miniserv.conf that looks like:
bind=10.8.0.1
port=12321
Now the panel simply does not exist on the public interface. This is a stronger control than any port number, because an attacker scanning the public IP has nothing to find.
Running Webmin behind a reverse proxy
Some teams prefer to keep Webmin on localhost and publish it through Nginx or Apache on port 443 with a path or subdomain. This lets you reuse an existing certificate and web application firewall. The outline is:
- Bind Webmin to
127.0.0.1in Ports and Addresses. - Configure the proxy to forward to
https://127.0.0.1:10000and to pass the originalHostheader. - In Webmin Configuration → Trusted Referrers, add the public hostname so Webmin accepts requests that come through the proxy.
- If you serve Webmin from a subdirectory, set the matching web prefix in Webmin so its links and redirects include it.
Test sign-in, sign-out and a module save after setting this up. Redirect loops almost always mean the proxy and Webmin disagree about the scheme or hostname.
Port settings at a glance
| Goal | Where | Setting |
|---|---|---|
| Change the panel port | Ports and Addresses / miniserv.conf | port= |
| Change discovery port | miniserv.conf | listen= |
| Listen on one IP only | Ports and Addresses / miniserv.conf | bind= |
| Allow only some clients | IP Access Control | Allowed hosts list |
| Open the port on Ubuntu | ufw | ufw allow PORT/tcp |
| Open the port on RHEL family | firewalld | --add-port=PORT/tcp |
Rolling back if you get locked out
If the new port does not respond and you have SSH access, put things back in under a minute:
sudo sed -i 's/^port=.*/port=10000/; s/^listen=.*/listen=10000/' /etc/webmin/miniserv.conf
sudo systemctl restart webmin
Then confirm the old firewall rule is still present and sign in again. Work out which layer blocked the new port, whether host firewall, cloud firewall or SELinux, before trying once more.
Port changes and Webmin clusters
If the server is part of a Webmin cluster, the master server stores each member's address and port in Webmin Servers Index. Change the port on a member and the master will lose contact until you update its entry. Edit the server in the index, enter the new port, and use the test link to confirm the connection before you push any cluster-wide changes. The same applies in reverse: allow the new port from the master's IP address on every member's firewall.
Listening on two ports during a migration
When several people or scripts rely on the old address, a hard cut-over causes support calls. Webmin can listen on more than one port at a time. Add a second row in Ports and Addresses with the new number, keep the old one for a week while you update bookmarks, documentation and monitoring checks, then remove the old row and its firewall rules. Monitoring is the item most often forgotten: update any uptime check that probes :10000, or it will page someone the moment the old port closes.
Do not forget IPv6
If your server has an IPv6 address, the panel may be reachable over IPv6 even when your IPv4 rules look tight. ufw applies rules to both families when IPv6 is enabled in /etc/default/ufw; firewalld rich rules need a separate family="ipv6" rule for IPv6 sources. Test from an IPv6-capable network, or switch off Accept IPv6 connections in Webmin if you never use it.
Finally, write the new port into your runbook and password manager entry for the server, so the next person to sign in does not start by assuming 10000.
Frequently asked questions
What port does Webmin use by default?
TCP 10000 over HTTPS. The companion default port guide explains the neighbouring ports as well.
Do I need to restart Webmin after changing the port?
Saving in Ports and Addresses restarts it automatically. After editing miniserv.conf by hand, run sudo systemctl restart webmin.
Which port number should I pick?
Any free, unassigned TCP port above 1024 that your firewall policy allows. Avoid common alternatives such as 8080 or 8443.
Is changing the port enough to secure Webmin?
No. It reduces automated noise, but IP restrictions, a trusted certificate and two-factor login provide the real protection.
Summary
Changing the Webmin port is safe when you do it in the right order: open the new port everywhere, switch Webmin, verify, then close the old one. The port number itself is only a small part of your defence. Binding to a private interface, restricting source addresses, using a trusted certificate and enabling two-factor login, all covered in the Webmin login guide, do far more to keep the panel out of reach.